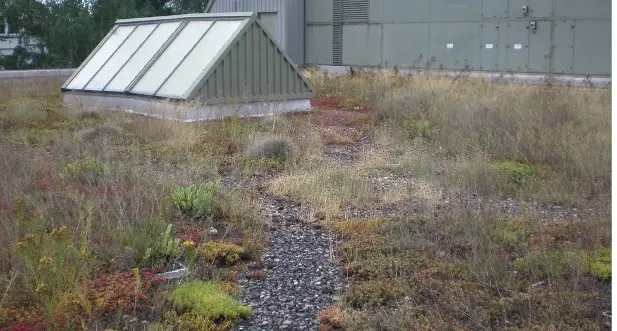
We were delighted to design (and build) a biodiverse green roof for a new coach house in North Vancouver.
(This post refers only to the project, with no details of the client or location.)
Design Inspiration: Habitat Templates for South-Western BC
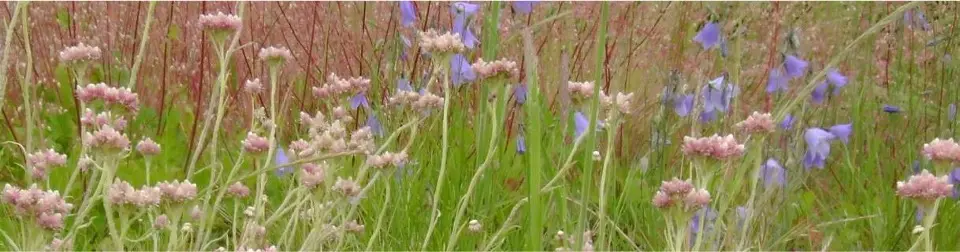
The client explicitly wanted a biodiverse roof, so we proposed a “meadow in the sky” featuring regionally native species. While green roofs are engineered, technical systems, they can also function as ecosystems. The “habitat template” approach seeks out regional ecosystems that occur in similar growing conditions to green roofs. With biodiversity and ecological function as our goal, we drew inspiration (and plant lists) from habitat templates that feature:
- shallow soils, sometimes without access to a deeper profiles
- predominantly mineral soils with relatively little organic content
- exposure to regular and/ or frequent drought
- limited/ no shade and exposure to the elements
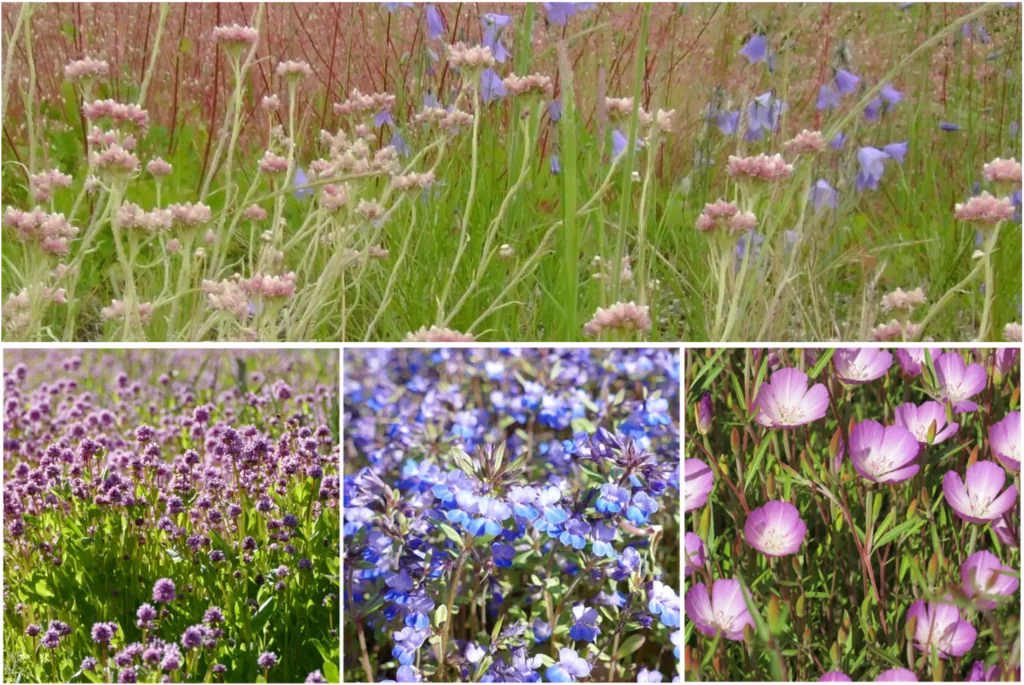
Coastal BC is fortunate to have several habitat templates for green roofs, including coastal bluff, Garry oak and associated ecosystems, and low-elevation montane. Many species indigenous to these communities have been tested on green roofs and are available from commercial nurseries. In addition to native Sedums, many herbaceous perennials and bulbs perform very well.
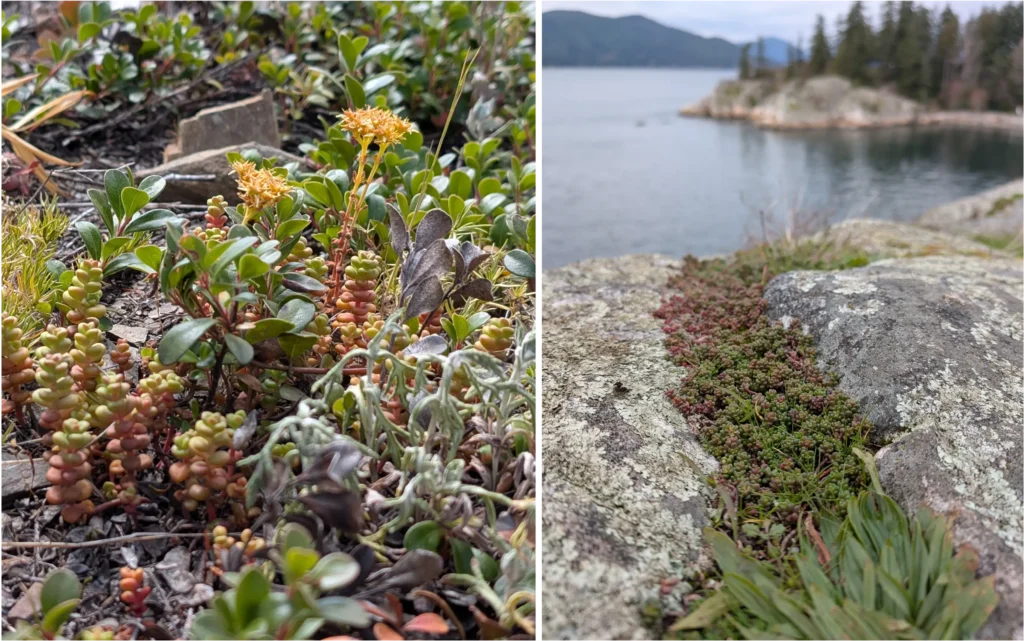
Due their shallow depths, extensive green roofs are commonly planted with succulent plants from the genus Sedum, which comprises many species tolerant to drought, with creeping forms and shallow roots. In Germany, where modern green roof systems were developed, Sedum creates a resilient ground-cover under taller plants. During wet seasons, the herbaceous perennials do well and the Sedums benefit from some shade. During periods of extended drought, the Sedums maintain ground cover even when everything else dies back.
In BC, however, many architects have developed a taste for “instant green”, and for an aesthetic of uniform Sedum roofs without taller herbaceous plants. As such, the majority of roofs here are specified with pre-vegetated systems, like Sedum mats or tiles. This is a pity, as BC is home to several indigenous species of Sedum, some of which are larval host plants for butterflies. While non-native Sedums DO provide nectar, they do NOT support the specialized larval (caterpillar) needs of native butterflies.
While pre-grown, tidy, non-native Sedum roofs have their place in certain contexts and for certain functions, this client wanted something different. This biodiverse green roof:
- features a diversity of native plants, with varying structural heights and bloom periods
- was built-in-place and seeded (nothing pre-grown)
- is permitted to be dynamic and seasonal
System Build-Up
To achieve our aim of species diversity, we wanted at least 5″ of growing media, which was fine for the 40 lb/ ft2 structural loading capacity. Given the slope, we specified a high-organic growing medium, in order to retain more water for the plants. The roof has a 12 degree slope, which led to some special design considerations. Technically, anti-erosion shear barriers are only recommended over 15 degrees, however, even on a 12 degree slope:
- the plants at the top of a slope will always dry out first, regardless of depth, season or irrigation. Gravity is relentless.
- a green roof seeded in the rainy season is vulnerable to erosion, especially before the plants have established their roots
Given the green roof would be built-in-place and would NOT use pre-vegetated systems, we specified the inclusion of shear barriers. This would mitigate any effects of the slope (erosion and uneven drying out) and delay water leaving the roof (good for the plants!). The best part: our roofer designed custom formed metal barriers, which can withstand reasonable weight. Indeed, on a few occasions we stepped on them and they didn’t budge nor buckle. Shear barriers were oriented with the right angle pointing upslope. To the question of waterproofing, the shear barriers were waterproofed ON TOP OF the fully waterproofed roof. The roof is thoroughly waterproofed (the roofer made sure of it!).
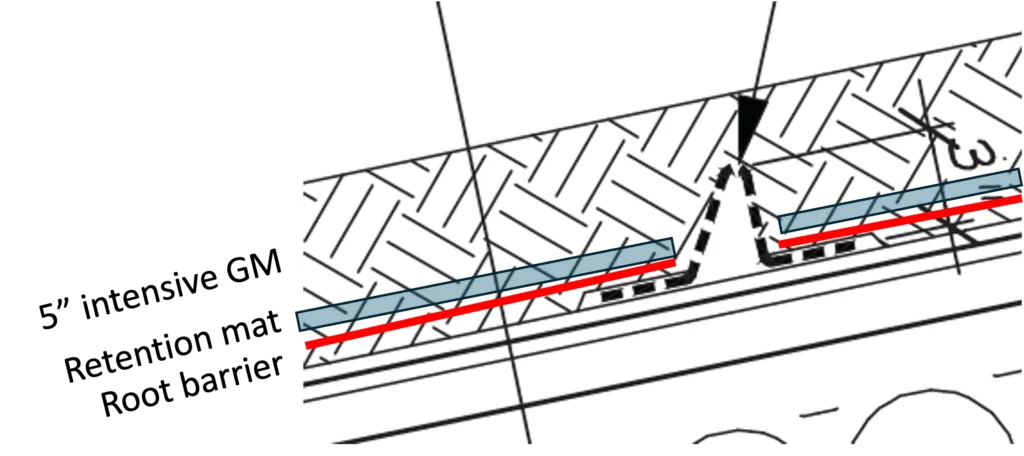
The vegetated roofing assembly (or green roof layers) are on top of the waterproofing. We went with a two-ply SBS (Styrene-Butadiene-Styrene) modified bitumen system, upon which we specified a root barrier. Since smooth surfaces are more prone to slippage than rough ones, and because of the slope, we specified a moisture retention mat that would a) prevent sub-surface erosion, and b) enhance moisture availability to plants.
Construction and Quality Control
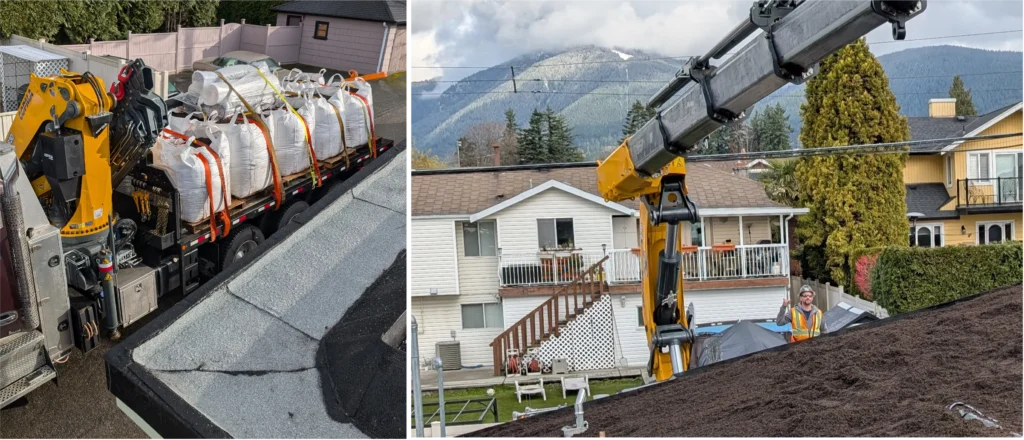
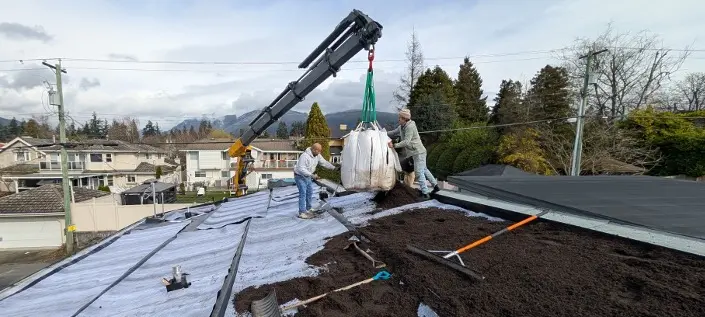
When the Client decided to self-install, we agreed to support the installation. Do-It-Yourself (DIY) can makes sense for relatively small roofs, as the economy of scale really only works for large areas. Following are some visual impressions.
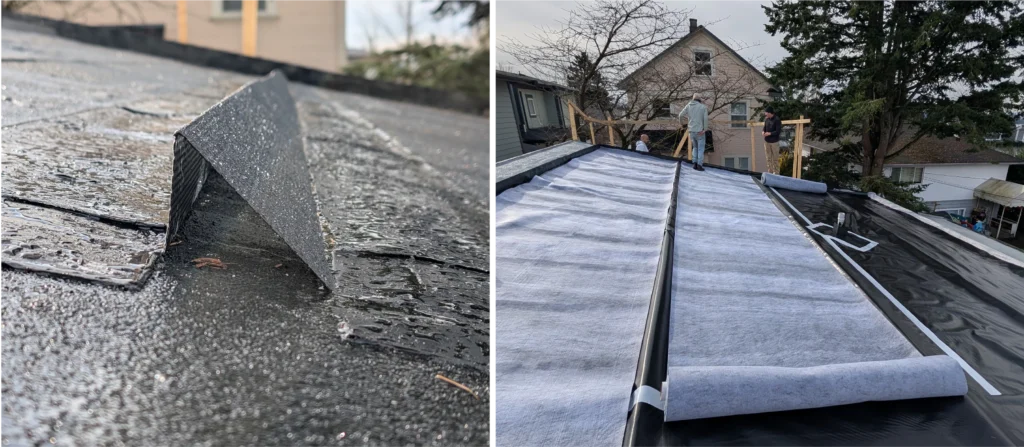
The anti-shear barriers were spaced < 1.8 m | 6 ft apart, to accommodate the moisture retention mat (which are 1.75 m | 5.75 ft wide), thereby eliminating the need to trim the mats (and the associated waste). Starting from the waterproofing, we installed the root barrier, taping all the overlapping seams. The moisture retention mat fit beautifully between the shear barriers. Once those layers were installed, we unloaded the growing media, making sure to spread the load evenly with rakes and shovels, checking the depth every so often.
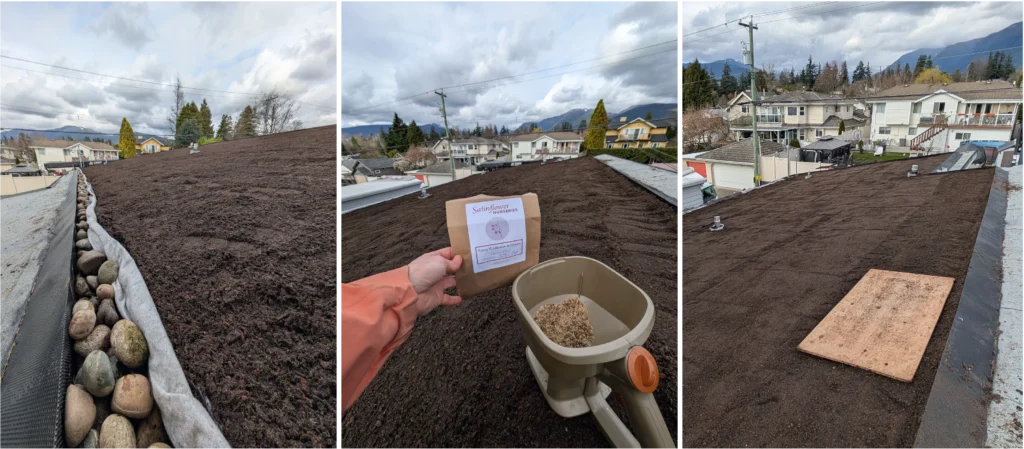
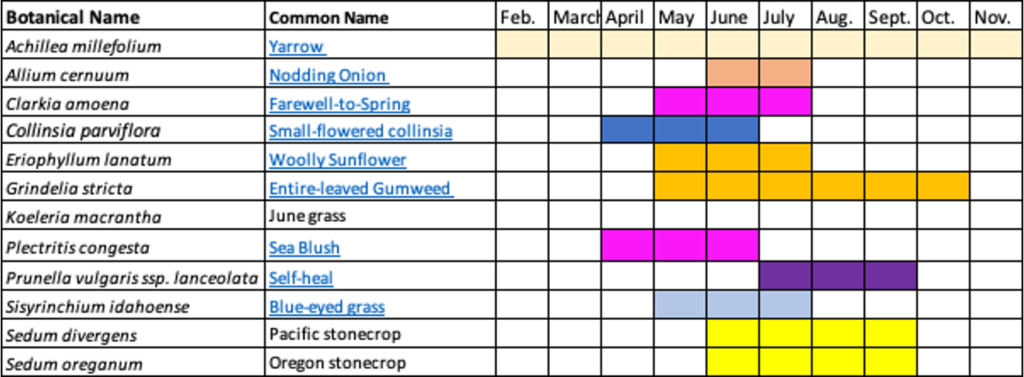
Once the growing media was in place, we sowed the seed. The seed, which were sourced from Satinflower, had been in the freezer for 3-4 weeks, as it had been a warm winter and they require cold stratification. Once sown, the seed was tamped down using a sheet of plywood and patterned stomping. It actually snowed the next day, which means the seed got the real deal! Hopefully this will mean good germination rates. Come spring, we will spread cuttings of native Sedum species. The table below shows the species list, with bloom period. All species are indigenous to the rain shadow of eastern Vancouver Island, and are pre-adapted to drought and exposure. All being well, the roof will flower from spring through to autumn.
If you made it this far, thank you for your interest! Please leave a comment below, as we love hearing from you! To inquire into a green roof design, please get in touch. For more information about green roofs in BC, check out the Green Roof Infrastructure Network, which offers all manner of outreach and education!
2 thoughts on ““Biodiverse Meadow in the Sky”: Green Roof Design-Build”
Hi, thanks for the detailed description of this project. Have you considered covering the seeded surface with a thin (2-5cm) layer of shredded wood mulch to help retain moisture, aiding in seed germination? The mulch would also help dissipate rainfall, reducing the risk of erosion which the roof may be prone to in its early years due to the slope and little to no roots in place to knit the system together.
Excellent comment, Cynthia. Yes, the original design did specify a jute/ coco fibre net for the exact reasons you itemize. We decided against it for a few reasons, in the end, justified by the high organic content of the growing media, and the subtle slope with excessive reinforcements.